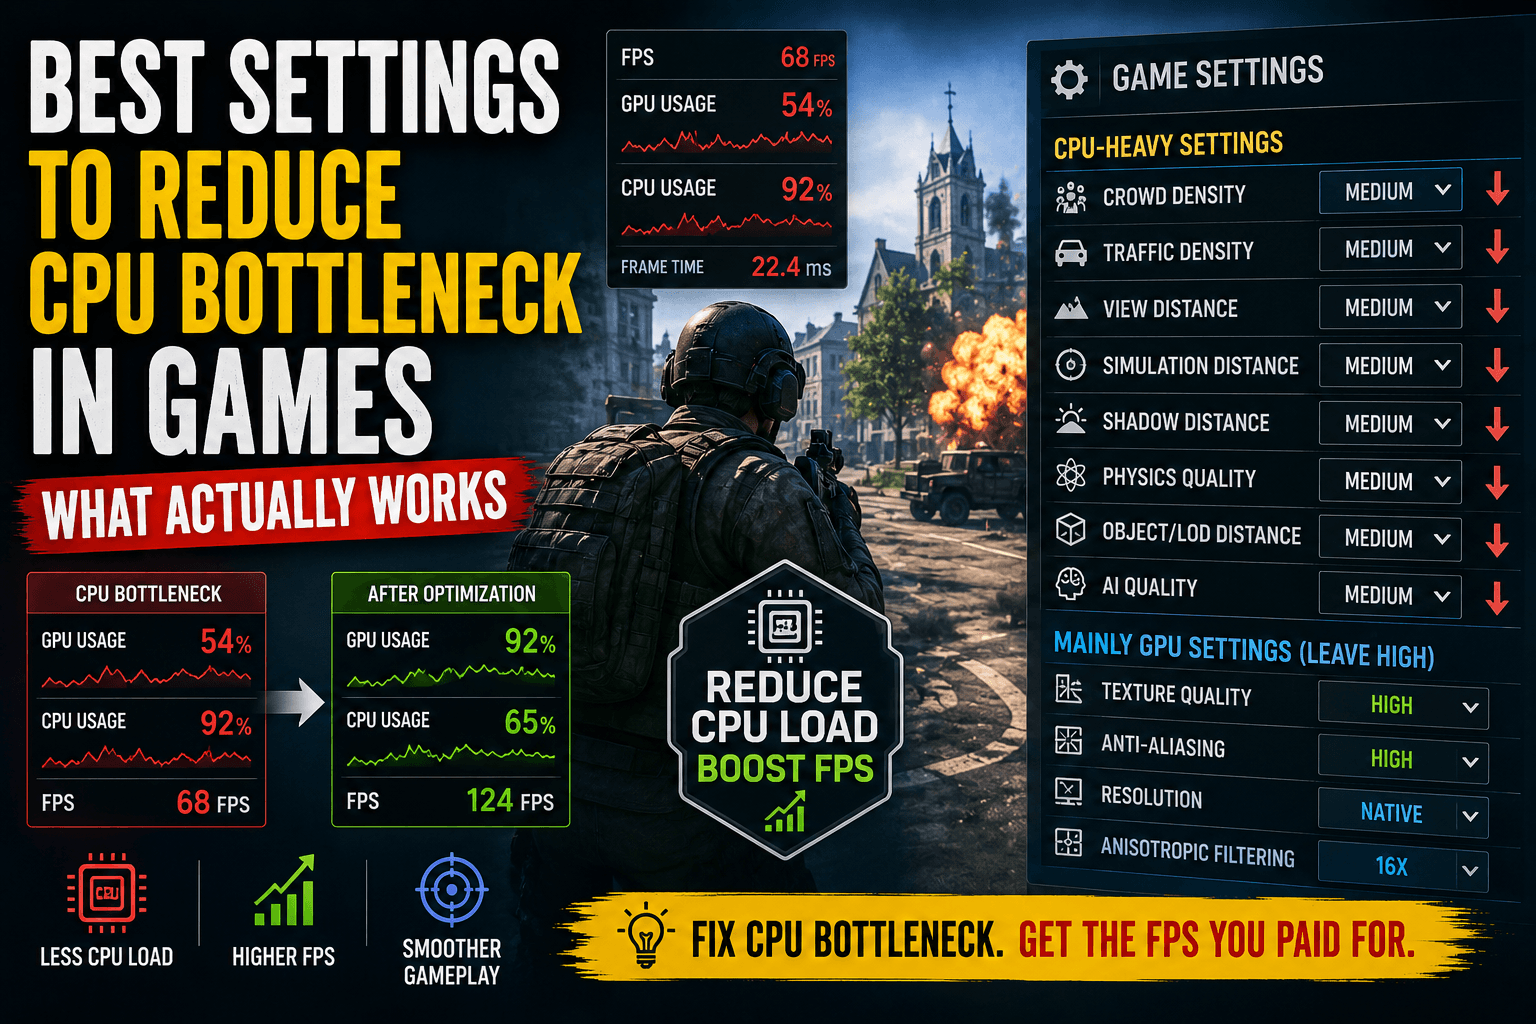
Best Settings to Reduce CPU Bottleneck in Games: What Actually Works

First, Make Sure You're Actually CPU-Bottlenecked
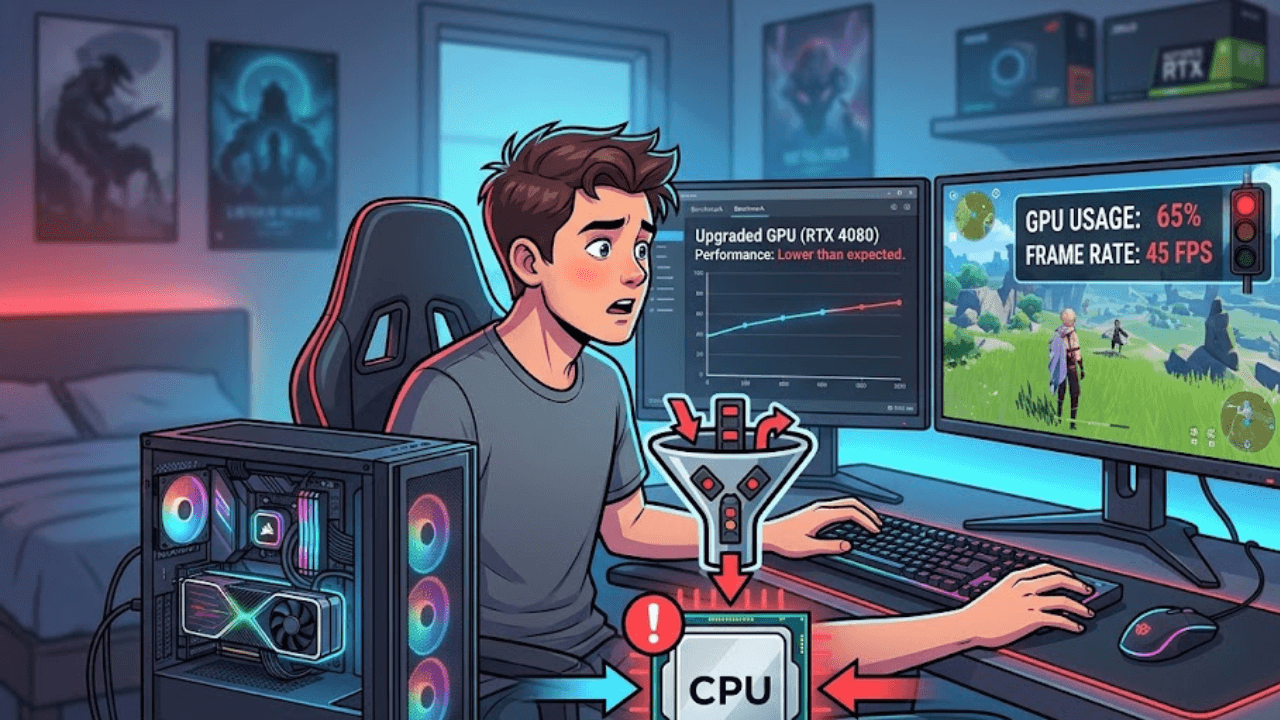
Before changing anything, confirm that the CPU is really the problem.
A typical CPU-limited scenario looks like this:
GPU usage stays well below 90-95%.
FPS is lower than expected.
One or more CPU threads are heavily loaded.
Lowering resolution doesn't produce a major FPS increase.
GPU clocks and temperatures look normal.
Increasing graphics quality can raise GPU usage without destroying FPS.
This is why total CPU usage can be misleading. A game might heavily depend on one or two threads while the rest of your CPU remains relatively underused.
Modern games can put significant CPU workload into AI, NPC behavior, physics, crowds, simulation, and game-world processing. Intel's developer material gives examples of games where higher CPU capability directly affects things such as NPC updates, crowds, cloth simulation, destruction, and AI-related workloads.
If you haven't confirmed the bottleneck yet, start with our guide on how to check if your CPU is bottlenecking your GPU.
Once you're reasonably sure the CPU is limiting performance, start here.
The Best Settings to Reduce CPU Bottleneck
Not all settings are equally useful. If you're CPU-limited, I'd adjust them in roughly this order.
Setting | CPU Impact | GPU Impact | What to Try |
|---|---|---|---|
Crowd/NPC Density | High | Low-Medium | Lower first |
Traffic Density | High | Low-Medium | Lower first |
View/Draw Distance | High | Medium | Lower moderately |
Simulation Distance | High | Low | Lower |
Physics Quality | Medium-High | Low | Lower if available |
AI Quality | High | Low | Lower if available |
Shadow Distance | Medium-High | Medium | Reduce |
Object/LOD Distance | Medium-High | Medium | Reduce carefully |
Texture Quality | Low | High | Usually leave alone |
Resolution | Very Low | Very High | Don't lower first |
Anisotropic Filtering | Low | Low-Medium | Usually leave alone |
The exact impact varies dramatically between games. That's why the table should be treated as a troubleshooting starting point rather than a universal FPS formula.
1. Lower Crowd and NPC Density First
If a game gives you a Crowd Density, Population Density, NPC Density, or Pedestrian Density slider, this is one of the first settings I'd test.
Every additional character isn't just another model for your GPU to draw.
The game may also need to calculate:
AI behavior
Animation
Pathfinding
Interaction
Physics
Audio behavior
Visibility
World-state updates
Intel's discussion of CPU scaling in games specifically highlights crowds, NPC animation, AI processing, and destruction as CPU-dependent workloads.
A good starting point
If you're using High, try Medium before jumping straight to Low.
You often don't need to eliminate crowds completely. A moderate reduction can take some pressure off the CPU while preserving much of the game's atmosphere.
This is particularly useful in open-world games where FPS drops happen in busy cities but performance is much better in empty areas.
2. Reduce Traffic Density
Traffic works similarly to NPC density.
In an open-world driving game, every vehicle may involve AI decisions, pathfinding, collision detection, animation, and world simulation.
That's CPU work.
If your GPU usage is low specifically when driving through busy areas, reducing traffic density can be much more effective than lowering texture quality.
NVIDIA's PC graphics guides have also demonstrated how population and distance-related settings can behave differently depending on the scene, which is why a setting's impact shouldn't be judged from one static benchmark location.
Try this
High → Medium
Then test the same busy area again.
If your minimum FPS improves while GPU utilization remains relatively low, you've likely found a CPU-heavy setting.
3. Lower View Distance, But Don't Destroy It
View distance is one of the most misunderstood settings.
Increasing it can require the game to keep track of more objects and potentially submit more work to the rendering pipeline.
But simply dragging the slider from maximum to minimum isn't always the best solution.
You'll often get much of the performance benefit by dropping it one or two levels.
Why this matters
Imagine a game rendering a huge city.
At maximum distance, the engine may need to consider far more:
Buildings
Vehicles
NPCs
Objects
Shadows
Terrain details
Reducing the distance tells the game that some of those objects don't need to be processed or rendered at the same distance.
NVIDIA's testing of distance scaling in GTA V is a good example of why the effect can vary by environment. The performance cost changed depending on the scene and other settings, particularly population density.
So don't benchmark view distance by staring at an empty field.
Test it where your FPS actually collapses.
4. Reduce Shadow Distance Instead of Shadow Quality
Here's a setting distinction that gets overlooked constantly.
Shadow quality and shadow distance aren't necessarily doing the same thing.
If you're CPU-limited, reducing how far shadows are calculated can be more useful than simply lowering shadow resolution.
Why?
The engine has to determine which objects are relevant to shadow rendering and where those shadows need to exist in the scene.
A practical starting point is:
Shadow Distance: High → Medium
Then test.
If you don't notice a meaningful improvement, restore it and move to another setting.
Don't blindly lower every shadow-related option.
5. Reduce Simulation Distance
Some games expose settings such as:
Simulation Distance
Object Simulation
World Simulation
AI Simulation
Gameplay Distance
These can be excellent CPU-bottleneck controls because they determine how much of the game world continues to be actively processed around you.
A distant object doesn't necessarily need the same level of simulation as something directly in front of your character.
If your game has a simulation-distance option, test it before sacrificing image quality elsewhere.
This is especially relevant in simulation-heavy, survival, strategy, and open-world games.
6. Lower Physics Quality When Available
Physics can be surprisingly CPU-intensive.
Depending on the game, physics may control:
Destruction
Vehicles
Ragdolls
Objects
Cloth
Environmental interactions
If your game has a Physics Quality setting, try reducing it from Ultra/High to Medium.
The visual difference may be smaller than what you get from reducing resolution or texture quality, while the CPU can have less work to process.
Again, this isn't universal. Some games barely change performance when physics settings are lowered.
That's why testing matters.
7. Reduce Object Detail or LOD Carefully
Object quality and Level of Detail settings can affect how much geometry and world information the game has to manage.
But this is where I recommend being conservative.
Dropping object detail too aggressively can produce:
Pop-in
Simplified geometry
Objects appearing late
Reduced visual clarity
Try moving from Ultra → High or High → Medium rather than immediately choosing Low.
The goal isn't to make your game look terrible.
It's to remove the specific workload that's causing the CPU bottleneck.
What NOT to Lower First
This is probably the most useful part of the entire guide.
If you're CPU-limited, don't automatically start lowering everything.
Texture Quality
Texture quality primarily affects GPU memory usage and texture handling.
If your GPU has enough VRAM, lowering textures may provide almost no improvement to a CPU-bound game.
You could make the game look noticeably worse without fixing the actual problem.
Resolution
Resolution is primarily a GPU workload.
If you're already CPU-limited at 1080p, dropping to 900p or 720p doesn't magically give the CPU more processing power.
In fact, it can make the CPU limitation even more obvious because the GPU finishes each frame faster and waits for the CPU.
Anisotropic Filtering
This usually isn't where I'd look for CPU bottleneck relief.
Keep it reasonably high unless you're troubleshooting a very specific GPU limitation.
The Counterintuitive Trick: Increase GPU Workload
This sounds completely backwards, but it can be useful.
Suppose you're playing at 1080p and getting:
95 FPS | GPU 55%
You increase the resolution to 1440p:
91 FPS | GPU 78%
Then 4K:
75 FPS | GPU 97%
That tells you something important.
At 1080p, the CPU was limiting how quickly frames could be produced.
At higher resolutions, the GPU takes over more of the workload.
This is why lowering resolution isn't automatically the right answer to a CPU bottleneck.
The objective isn't simply "make FPS number bigger."
You want the best balance between frame rate, frame-time consistency, image quality, and hardware utilization.
FPS Capping Can Actually Help
An unlimited FPS setting can make a CPU-limited game work unnecessarily hard.
If your system can bounce between 100 and 160 FPS but frequently suffers from CPU spikes, an FPS cap can produce a more consistent workload.
For example:
Uncapped: 110 → 145 → 97 → 132 → 105 FPS
Capped: 110 → 110 → 108 → 110 → 110 FPS
The second experience may feel considerably smoother even though its peak FPS is lower.
Try a cap that your system can sustain consistently rather than chasing the highest possible number.
If you're using a VRR display, you can also experiment with a cap slightly below the monitor's maximum refresh rate.
Don't Forget Background CPU Usage
Sometimes the "CPU bottleneck" isn't entirely the game.
Before blaming your processor, close unnecessary background workloads such as:
Browser tabs
Game launchers
Video encoding
Cloud synchronization
Hardware monitoring tools you don't need
Background downloads
Other CPU-heavy applications
You don't need a perfectly empty desktop.
But if your CPU is already struggling to maintain frame times, another process consuming significant CPU time can make the problem worse.
A Better Way to Tune Your Game
Don't change ten settings at once.
Use this process instead.
Step 1: Pick a repeatable test area
Find the part of the game where FPS normally drops.
A busy city street is better than an empty training area if that's where your problem occurs.
Step 2: Record your baseline
Write down:
Average FPS
1% low FPS
GPU usage
CPU usage
Individual CPU thread usage
CPU temperature
GPU temperature
RAM usage
VRAM usage
Step 3: Change one setting
Start with crowd density, traffic, view distance, or simulation distance.
Step 4: Run the same test again
If FPS improves, you've identified a useful setting.
If nothing changes, restore it and move on.
Step 5: Watch the 1% lows
Average FPS isn't everything.
A change from 90 FPS average to 92 FPS may sound insignificant, while improving 1% lows from 48 to 62 FPS can make the game feel much smoother.
My Recommended CPU-Bottleneck Settings Order
If I had to troubleshoot a CPU-limited game from scratch, I'd use this order:
Crowd/NPC density
Traffic density
Simulation distance
View/draw distance
Shadow distance
Physics quality
Object/LOD distance
FPS cap
Background CPU processes
Only then consider more aggressive compromises
This approach preserves visual quality much better than simply selecting the Low preset.
The Settings That Usually Give You the Best Trade-Off
Priority | Setting | Why Change It? | Visual Cost |
1 | Crowd/NPC Density | Reduces AI and character processing | Low-Medium |
2 | Traffic Density | Reduces vehicle simulation | Low-Medium |
3 | Simulation Distance | Reduces world processing | Low |
4 | View Distance | Reduces object/draw workload | Medium |
5 | Shadow Distance | Reduces shadow-related work | Low-Medium |
6 | Physics | Reduces simulation complexity | Medium |
7 | Object/LOD Distance | Reduces geometry/world workload | Medium |
8 | FPS Cap | Controls CPU spikes | Very Low |
9 | Texture Quality | Mostly GPU/VRAM-related | Medium-High |
10 | Resolution | Primarily GPU-related | High |
The exact order can change from game to game, but the principle stays the same:
Reduce the settings that create CPU work before sacrificing settings that mostly affect the GPU.
When Settings Aren't Enough
There's a limit to what software tuning can accomplish.
If you've lowered CPU-heavy settings, capped your FPS, closed background applications, and your CPU is still consistently limiting performance across multiple games, you may simply have reached the processor's practical limit.
That's when hardware becomes relevant.
But don't jump straight to buying a CPU because one game runs poorly.
A CPU limitation in a simulation-heavy game doesn't necessarily mean your processor is inadequate for everything else.
Look for a pattern across several games.
If you're also experiencing unusually high CPU usage while gaming, our upcoming CPU-performance guides can help you narrow down whether the limitation is hardware, software, or simply game-engine behavior.
Final Verdict: Best Settings to Reduce CPU Bottleneck
The best settings to reduce CPU bottleneck aren't necessarily the settings that make your game look worse.
They're the settings that reduce the workload your CPU is actually struggling with.
Start with crowd density, traffic, simulation distance, view distance, shadow distance, physics, and object detail. Leave textures and resolution alone initially, because they're much more closely associated with GPU workload.
Most importantly, test one change at a time.
A good gaming PC isn't one where every component sits at 99% usage. It's one where the hardware is balanced well enough to deliver the frame rate and frame-time consistency you actually want.
And if your GPU usage remains low after all these changes, don't keep lowering graphics settings blindly. Go back to the evidence: check individual CPU threads, clocks, temperatures, RAM usage, frame caps, and the game's behavior in different scenes.
That's how you fix a bottleneck instead of simply making the game look worse.
If this guide helped you find the setting that was holding your FPS back, share your CPU, GPU, game, resolution, and the setting that made the biggest difference. Your results could help another PC gamer diagnose the same problem.
FAQ: Best Settings to Reduce CPU Bottleneck
What settings reduce CPU bottleneck the most?
Crowd density, NPC density, traffic, simulation distance, view distance, and some physics settings are usually among the most useful options to test. The exact impact depends on the game's engine.
Should I lower graphics settings if my CPU is bottlenecking?
Only the CPU-heavy settings. Lowering textures or resolution may do little because those settings primarily reduce GPU workload.
Does lowering resolution fix CPU bottleneck?
Usually not. If you're already CPU-limited, lowering resolution can leave the CPU as the limiting component while giving the GPU even less work to do.
Can an FPS cap reduce CPU bottleneck?
An FPS cap doesn't make your CPU more powerful, but it can prevent the CPU from constantly chasing unnecessarily high frame rates. That can reduce CPU spikes and improve frame-time consistency.
Should I upgrade my CPU if changing settings doesn't help?
Not immediately. First confirm that the CPU is consistently the limiting component across multiple games and workloads. If it is, and your desired FPS cannot be achieved through sensible settings changes, a CPU upgrade may be justified.

Written by
Kashif
Founder & Lead Editor, FixPlay
Kashif is the founder and lead editor at FixPlay, covering PC hardware, console gaming, and breaking industry news since 2021. He builds and benchmarks his own test rigs before writing any hardware guide, and has covered major releases including GTA 6, Elden Ring, and Call of Duty season updates. His GPU and settings guides are based on hands-on testing, not spec-sheet guesses.
View all posts by Kashif
0 Comments
No comments yet - be the first to share your thoughts.